Shoot First, Eat Later: The Stealth Art of Making Delivery Food Look Legendary
Photo: Drheggie, CC BY 4.0, via Wikimedia Commons
Every ninja knows the real mission starts before the action. Same goes for your takeout. The photo happens before the first bite, and if you've ever posted a sad, steam-fogged shot of a katsu sando that looked like evidence from a crime scene, this debrief is for you.
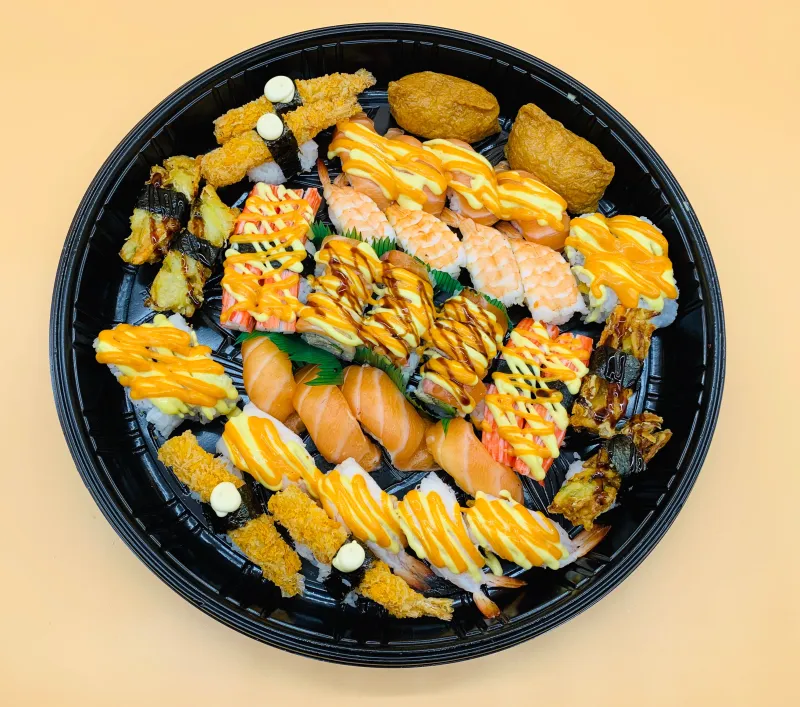
We ran an unofficial test in the Ninja House kitchen: same dishes, same phone, two approaches. The 'before' photos looked like they were taken by someone fleeing the premises. The 'after' photos? Let's just say our spicy tuna crunch roll finally got the respect it deserves. Here's the full playbook.
Rule Zero: Work Fast, But Not That Fast
Food stylists have a saying: you're racing the clock the second the lid comes off. Steam, sauce sheen, and crispy edges all have a shelf life measured in minutes. But here's what most people get wrong — you don't need an hour-long photoshoot. You need about ninety seconds of prep before you open the bag.
Set your stage first. Wipe the table. Pick your surface. Open your phone camera app. Then unbox. The pros call it mise en place; we call it not fumbling with your camera while your tempura goes lukewarm.
The Window Is Your Best Weapon
Forget buying lights. The single biggest upgrade you can make costs zero dollars: move toward natural light. Set up near a window and shoot with the light coming from the side or slightly behind your dish. Side lighting creates shadows and texture — that's what makes fried chicken look crackly and noodles look glossy instead of flat and sad.
Overhead kitchen lighting is the enemy. It flattens everything and adds a weird yellow cast that makes even beautiful ramen look like cafeteria soup. If you're shooting at night (no judgment, some of us order at 9 PM), turn off the overheads and use a single lamp positioned to the side of your dish. One directional light beats four ceiling bulbs every time.
The Container Swap Trick
Here's a secret straight from the stylist world: half of food photography is hiding the container. Deli cups and clamshells are engineered for transit, not glamour. You don't have to fake a restaurant plating — just make one or two smart swaps:
- Slide it onto a plate. Any plate. A plain white one from your cabinet instantly reads 'intentional.'
- Keep one element in packaging. A chopstick sleeve, a sauce cup, the branded bag peeking into frame — it tells the story that this is takeout, and honestly, that's part of the charm.
- Add one prop, max. A pair of wooden chopsticks, a folded napkin, a glass of something cold. More than that and you're styling a magazine cover, not snapping lunch.
Five-Second Staging Moves That Actually Work
Borrow these from the pros and nobody will know you shot this over your kitchen table:
- Shoot at 45 degrees, not straight overhead. Straight-down shots work for flat lays like sushi rolls, but a slight angle shows off height — the stack of a katsu sando, the pile of a donburi.
- Get closer than feels comfortable. The number one amateur mistake is shooting from three feet away. Fill the frame with the food.
- Break something open. Pull apart the sushi roll, cut the sandwich in half, let the filling show. Cross-sections are irresistible.
- Wipe the rim. Sauce on the bowl's edge reads as messy in a photo even when it's delicious in real life. Two seconds with a napkin, huge difference.
- Take a bite first. Counterintuitive, but a dish with one bite missing looks lived-in and real. Perfection is suspicious.
Keeping It Hot While You Shoot
The number one concern every takeout photographer has: 'But my food will get cold!' Here's the field-tested sequence. Keep lids on and containers stacked until the last possible moment — trapped steam keeps everything warm. Shoot your hero dish first while it's hot, and let sides wait in the closed bag. If you need multiple setups, microwave-safe containers can take a 20-second warm-up between shots. And remember: crispy items photograph best slightly cooled anyway. Your tempura will forgive you.
The Before and After: A Case Study
We tried it with three Ninja House favorites. The 'before' shots — fluorescent light, container in frame, shot from across the table — looked like surveillance footage. The 'after' shots, using nothing but a window, a white plate, and 45-degree angles, looked like something a food editor shot on assignment. Same food. Same phone. Different mission planning.
The best part? Total time added: under three minutes. Total gear required: zero. Total likes gained: we'll let you report back on that one.
Now if you'll excuse us, our roll is getting cold — and this time, it's for eating, not shooting.